Panna cotta

This is a wonderful summer dessert to serve when having guests. Preferable enjoyed outside on a candlelit terrace. That’s at least how we enjoyed it last night! I have had plenty of panna cotta’s, in Italy and elsewhere, but must say that this one with blueberry jam is really really good. You could off course swap the blueberries for raspberries, strawberries or even blackberries if you like. The rest of the recipe stays the same.
Agar agar is a vegetarian substitute for gelatin. It’s available in larger supermarkets or Asian shops.

Serves 4

Blueberry jam:
250g frozen blueberries
200 ml water
50g sugar

Add blueberries, water and sugar to a medium sauce pan. Bring to a boil, turn down the heat and let cook until it has thickened and looks like jam. Keep stirring to prevent the berries from burning. Let it cool.

Panna cotta:
250 ml whipping cream
250 ml full fat milk
35g sugar
1 tsp agar agar powder
2 tsp vanilla extract

Combine all the ingredients in a medium saucepan. Bring to a simmer, stirring now and then. Don’t let it boil! Let it cool for a few minutes.

Divide the jam over 4 serving cups/glasses. Divide the panna cotta on top of the jam. Keep 3-4 hours or overnight in the fridge. Decorate with fresh blueberries before serving.

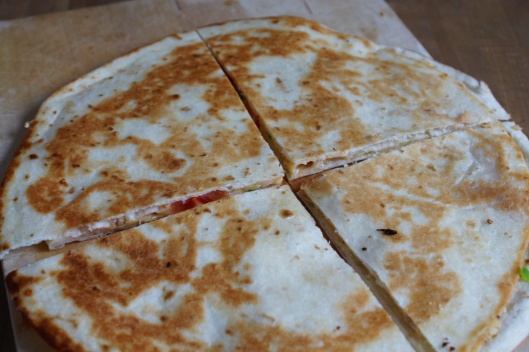
Quesedillas

I felt like a quick and easy but warm lunch today (it’s what you want in this awful autumn like weather). And what is easier to make than quesedillas? Done in a few minutes and they taste terrific with that oozing cheese and hot chilies! We had loads of these in Mexico, being a delicious afternoon snack or if you order a couple, a whole meal. My favourite quesedilla was in the small town of Alamos, enjoyed on the square one evening, watching the young local male population cruise around in their pick ups and Stetsons, trying to get attention from the pretty girls. They didn’t have too much luck with the ladies but if that was down to the hats of the lack of actual communication (no-one left their pick ups) was hard to say…!

Serves 4

Olive oil
8 tortilla’s
1 large green chili pepper
3 large tomatoes
120g grated old Gouda cheese
Sour cream
1-2 avocado, sliced

Cut the chili lengthwise and discharge the seeds. Chop finely.
Quarter the tomatoes and discharge the seeds and the gooey middle part. Cut the flesh in small cubes.
Heat a bit of oil on medium heat in a skillet. Add one tortilla. Sprinkle evenly with a quarter of the green chili, tomato cubes and grated cheese. Cover with a second tortilla. Press down lightly with a spatula. Let it cook for a couple of minutes, lower the heat if it browns too quickly. Turn the whole tortilla around using two spatulas and cook the other side for another couple of minutes. Transfer to a chopping board and let it cool for a couple of minutes until cutting into squares. Cook the remaining tortilla’s. Serve warm with sour cream and avocado.

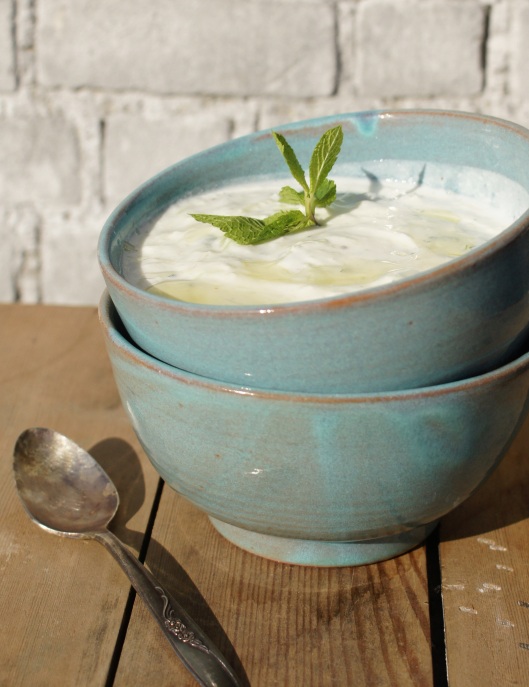
Tzatziki

A month ago Eric and myself had a party to celebrate me turning the big 4 0 (a bit early cos my birthday is not until next week but it just turned out better that way) and to celebrate Eric’s birthday and the amazing fact that Eric’s book ‘Look sir, a bird’ has been published!!! It looks absolutely fab and I am so proud of him! He’s been interviewed in the local news paper and both the local radio and TV station are interested too!
If anyone would like to buy it, it’s available here.
Anyway, for the party I had made this tzatziki (among lots of other tasty stuff!) and some people were asking for the recipe. So I thought I share it here!

500g Greek or Turkish yoghurt
1/2 cucumber
3 garlic cloves, minced
2 tbsp fresh mint, chopped + extra for garnish if you like
2 tbsp olive oil
1 tbsp white wine vinegar
salt and pepper

Add the yoghurt to a bowl. Peel the cucumber (I always use my cheese slicer to do this). Grate the cucumber finely. Carefully squeeze out the water with your hands (a bit at the time works the best). Add the grated cucumber, garlic and mint to the yoghurt, stir to combine. Pour in the oil and vinegar, again stir to combine. Season with salt and a bit of pepper. Keep cool in the fridge for a few hours before serving. Or make it a day in advance.

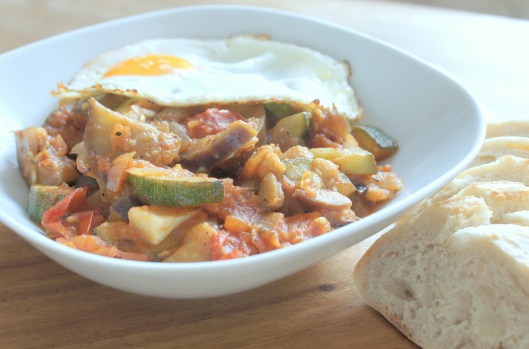
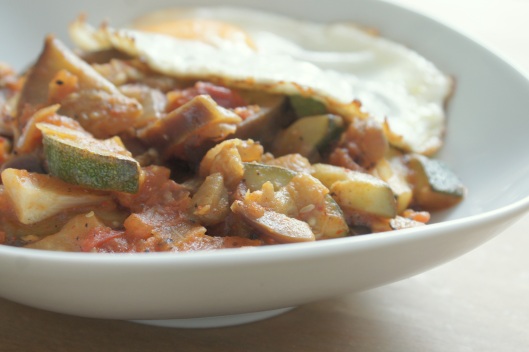
Pisto

We are a group of international foodies that have started a cooking club together. So the idea is to meet up once every two months at someone’s home to cook, eat and have fun together. Each time there will be a theme picked by the hostess. First time out Spain was picked as the theme and we got to make some really wonderful dishes, including this Pisto. Pisto is the Spanish equivalent to the French Ratatouille. The recipe we learned is from my friend’s Spanish grandmother which made it very unique and special. Usually in a Pisto there will be green paprika’s however Eric is not fond of that so in my version I swapped them for eggplant. I also added garlic for some more flavour. Traditionally Pisto is served with a fried egg and bread to make it a complete meal.

Serves 4
4 tbsp olive oil (or much more if you want to follow the original recipe!)
1 large onion, peeled and chopped
2 garlic cloves, minced
1 large courgette, cut in cubes
1 large eggplant (or 2 green paprika’s), cut in cubes
4 large very ripe tomatoes
salt and pepper

4 eggs, fried
some nice bread

Heat the oil om medium heat. Gently fry the onion and garlic. Once the onion is transparent and starting to brown, add the other ingredients. Cook for at least 30 minutes. The vegetables should be very soft and well cooked. Season with salt and pepper.

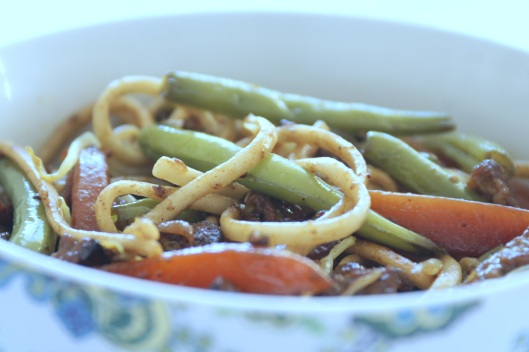
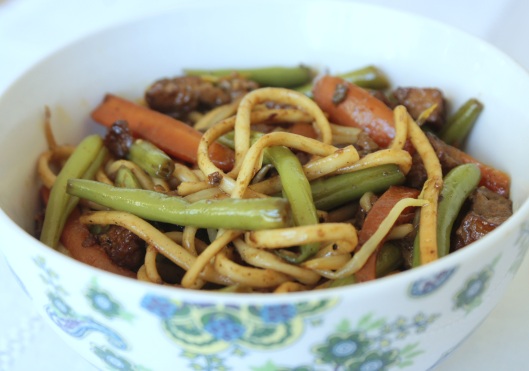
Singapore noodles

We had Singapore noodles in South of India, after being just a few days in the country. These first few days we were a bit reluctant to try the street food. Especially in this town where all small eateries were located on a very busy street with plenty of traffic (cars, trucks, cows, goats, people and what have you!). But we found one little place where you could sit inside and it looked clean enough too. The waiter was very friendly and he recommended us to try the noodles. However we just couldn’t believe our eyes when he walked outside with two empty plates and had the guy from the food stall on the street next to our eatery to fill up the plates from his huge wok! We had no choice but to eat it and it was (off course) just fantastic and (off course) we experienced no health issues afterwards!
Eric has written down this fun travel anecdote and others which will be published as a book! How cool is that?! He is so excited and I am so proud of him! The book is called ‘Look sir, a bird’ and is in Dutch. From next week Friday you can purchase it here. He also has a Facebook page which is in both Dutch and English.

Serves 4

500g Chinese rice noodles
100g carrots, Julienne (cut like matchsticks)
150g green beans, cut in two
2 tbsp sunflower oil
1 onion, chopped
1 bunch of spring onions, sliced
2 garlic cloves, minced
1 tbsp curry powder
2 tsp red chili flakes (or powder)
300g quorn (or tofu)
1 tbsp honey
1 tbsp soy sauce
150g beans sprouts
Salt and pepper

Boil the noodles according to the instructions on the package. Drain and set aside. Meanwhile, blanch the carrots and beans (add to boiling water for 3 minutes and then let cool off in cold water).
Heat the oil in a wok. Gently fry the onion and garlic for a couple of minutes. Add the curry powder and chili flakes and stir to combine. Add the quorn and stir again to combine so the quorn is well coated. Add the cooked noodles and the blanched vegetables. Combine all with two wooden sppons. Add honey, soy sauce and bean sprouts and combine. Season with salt and pepper. Let it all heat through and served in individual bowls.

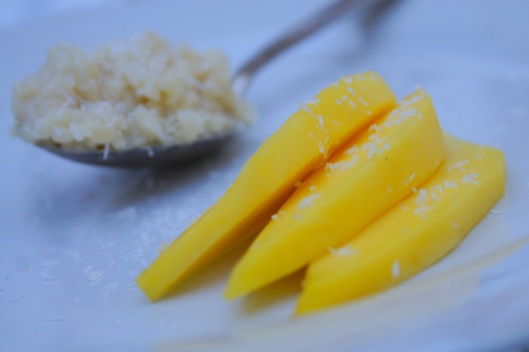
Coconut rice pudding

This lovely Sunday morning I would like to start with apologising for not posting that often any longer. It has nothing to do with cooking, shooting or eating itself. I have in fact got myself a new job (hurrah!). This first weeks I have been working fulltime which is something I haven’t done since 2003. In the evenings I am just too exhausted to do anything at all and the weekends are so short as I need to fit in all those things that I don’t get done during the week. On the good side, I do enjoy my work, the weather is fantastic at the moment and we enjoy long, cosy evenings on our roof terrace. The pics from this dish are shot on the new terrace sofa late one evening and I have to say I really like the light. However shooting a rice pudding and making it look appetizing is not an easy task…
This dish is typical in Thailand and I had it in one of those small food stalls you see everywhere in Bangkok. I got it served with papaya however I think mango works better with the coconut. It’s really quick to make and I love to eat it after a lighter meal, like a soup.

Serves 4-6

250g dessert (pudding) rice
400 ml coconut milk
400 ml milk
75g palm sugar (or brown sugar)
1/4 tsp salt
1 mango or other tropical fruit
shredded coconut

Add the rice, coconut milk, milk, palm sugar and salt to a sauce pan. Bring to a boil, reduce the heat and let cook 15-20 minutes until the rice is soft and cooked through. Try not to stir too much as this will break up the grains and create a very sticky, gluey rice lump!
Serve while still warm with fruit and the shredded coconut.

Soda bread

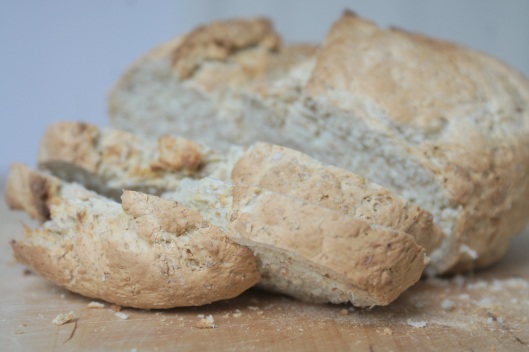
What I love most about Ireland (next to the lovely people and the fantastic nature off course!) is the soda bread. The use of bicarbonate of soda rather than yeast gives it a wonderful flavour and the fact that it doesn’t have to rise makes it deliciously firm and chewy. Which means it’s really quick to whisk together when ever you feel like it.
I had loads of soda bread while living on The Emerald Isle. Favourite ones being in a bed & breakfast in Wexford where the owner served it to us warm with a variety of home-made marmalade. And in Howth, North of Dublin, where you can as pub grub get this amazing seafood platter served with soda bread and real butter. And in Kilkenny where I had a delicious, hearty mushroom soup with slices of soda bread on the side (or was it the other way around?). Oh, I probably could just go on and on…!
I made a loaf this morning and we had it for both breakfast and lunch with raspberry jam and salty goats cheese, which I bought at this amazing Sunday market in Brussels last weekend (at the market you could also have oysters with a glass of champagne. Before noon. We settled for some sparkling rosé and a goodie bag to bring with us home. Don’t you just love things like that?!).

Makes 1 loaf

250 g white flour
250 g whole-wheat flour
1 tsp bicarbonate of soda
½ tsp salt
350 ml buttermilk

Preheat the oven to 200ºC.
Add the whole-wheat flours, bicarbonate of soda and salt into a bowl.
Make a well in the centre and pour in the buttermilk. With a wooden spoon, gradually stir the flour into the buttermilk to form a soft dough. Bring the dough together with your hands, then turn it out onto a lightly floured work surface. Knead lightly and briefly until it forms a smooth ball.
Cover a baking sheet with baking paper. Put the ball on the sheet and flatten it slightly to make a round loaf about 19 cm in diameter. Using a sharp knife, cut a deep cross in the top of the loaf.
Bake for about 30 minutes or until well risen and browned, and the bread sounds hollow when tapped on the base. If it sounds moist and heavy, bake for a further 3–5 minutes and then test it again.
Transfer to a wire rack and leave to cool completely.

Pasta Puttanesca

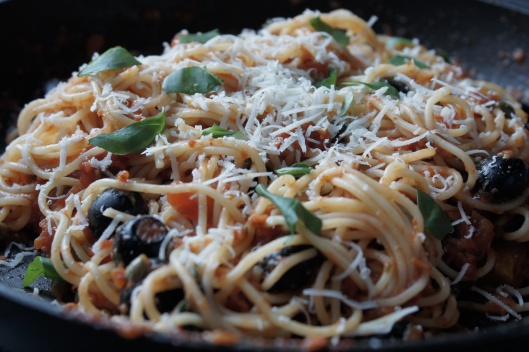
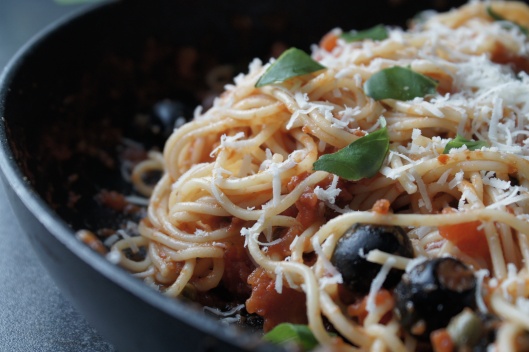
The first time I made Pasta Puttanesca was from a stolen recipe. I still feel bad about it. Cos it wasn’t just a stolen recipe, it was stolen from Jamie Oliver. This is a good 7-8 years back. Someone had got hold of a digital version of his new cookbook before it got published. It got sent around and I was one of the (un)lucky ones to receive it. I remember scrolling through it feeling rather queasy. I wasn’t suppose to read this. But then I thought, I got this by a chance and it was too late anyway so what harm would it do if I tried one dish, maybe one of the easier one. So I chose Pasta Puttanesca. I am not sure I liked it that much the first time, thinking it was rather bitter. However over the years I have developed my own Puttanesca recipe and it has a lovely combination of salty, spicy and sweet flavours. It’s one of those dishes you always can make when your fridge is gaping empty as most ingredients comes from pots or tins.
I kept the stolen cookbook for a while but never cooked anything else from it. I also didn’t by the original version when it hit the stores. Thinking about it now, I probably should have…

Serves 4
500g spaghetti
2 tbsp olive oil
3 garlic cloves, minced
1 tsp red chili flakes
1,5 tbsp capers
10 small anchovy fillets
100g black olives
2 cans (800g) chopped tomatoes
black pepper
grated parmesan cheese
shredded basil

Cook the spaghetti according to the instructions on the package. Drain and keep warm.
Meanwhile, heat the olive oil on medium heat in a skillet. Gently sauté the garlic and chili flakes for a minute. Add the capers, anchovies and olives. Stir to combine. Add the tomatoes and bring to a boil. Reduce the heat and let it simmer for 5 minutes. Season with black pepper. Add the drained pasta to the sauce. Combine with wooden spoons. Serve with the grated parmesan cheese and basil.
If you prefer you could use fresh tomatoes intead of out of a can. And rather than basil, parsley or oregano is really tasty too.

Lemon meringue pie

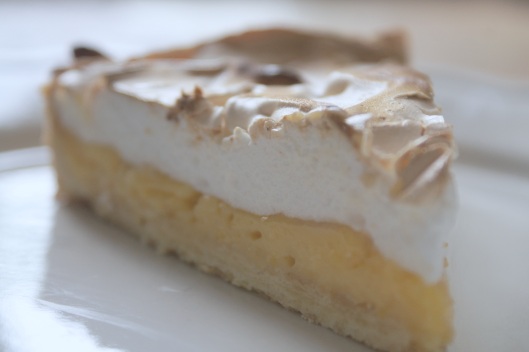
I have eaten lemon meringue pie in several places, thinking where did I have the best one. I got the choice narrowed down to 3 places; the little cosy local pub in Leith, Edinburgh, the stepping-back-in-time restaurant in a small coastal town in False Bay close to Cape Town and the famous coffee and tea institution Bewley’s, settled on Dublin’s most busiest shopping street. Which one had the crispiest, thinnest pie crust, the most silky, smooth lemon custard and the most fluffy, soft white meringue? The pie in Leith was delicious however wasn’t the crust a bit too crumbly and the slice a tad on the small side? The pie in Dublin was wonderful but was it really baked that same day and couldn’t the meringue layer have been a bit thicker? Then the one in False Bay. Well, it was absolutely stunning looking, the layers were perfect and it was still a bit warm so definitely baked that morning. The custard was lemony and silky and the meringue thick and fluffy and sweet enough the balance out the acidity from the lemons….Folks, I do think we have a winner!
Buy hey, we can’t wait to have a slice until we head down to South Africa next time, so here is my recipe to try out meanwhile! Don’t let all the steps put you off, if you just take your time and stay focused it’s really not very difficult to make. And the result is amazing! I had a few people trying it out and only got big smiles back!

8-10 pieces

Pastry
175g all-purpose flour
1 tbsp icing sugar
100g cold butter
1 egg yolk
1 tbsp water

Filling
2 level cornflour (maizena, dissolved in a bit of water)
100g caster sugar
2 lemons, finely grated (zest)
125ml fresh lemon juice (from 2-3 lemons)
100 ml fresh orange juice (from 1 orange) + 100 ml water
85g butter, cut into pieces
3 egg yolks + 1 whole egg

Meringue
4 egg whites
200g caster sugar

In total you need 5 eggs. 4 should be seperated where the whites are used for the meringue. One yolk is used in the pastry and the other 3 in the custard together with one whole egg. They should all be at room temerature.
Heat the oven to 200°C.
For the pastry, add the flour and icing sugar to a bowl. Cut the butter in small squares. Rub butter into the flour using your fingers until it resembles fine breadcrumbs. Add the egg yolk and water. Mix until you get a firm ball. Wrap the ball in plastic and let it rest in the fridge for 30 minutes.
When rested, roll the pastry on a floured surface to a large round (large plate size). Place the pastry in a quiche dish (22 cm in diameter). Gently press the pastry down around the edges. Prick the base with a fork. Blind-bake the pastry shell (put a baking sheet filled with dry beans in the shell) for 15 mins, then remove the sheet and beans and bake a further 5-8 mins until the pastry is pale golden and cooked. Set aside.
Lower the oven to 180°C.
While the pastry bakes, prepare the filling: mix the cornflour (maizena with some water), sugar and lemon zest in a saucepan. Stir in the lemon juice and the orange juice with the water gradually. Cook over a medium heat, stirring constantly, until thickened and smooth. Once the mixture bubbles, remove from the heat and beat in the butter until melted. Beat the egg yolks (save the whites for the meringue) and whole egg together. Stir the eggs into the pan and return to a medium heat. Keep stirring for a few minutes, until the mixture thickens (it should look like thick custard). Take off the heat and set aside while you make the meringue.
Put the egg whites in a large, clean, fat-free, bowl. Whisk to soft peaks, then gradually add the sugar. Keep whisking until glossy white and thick.
Pour the custard filling into the pastry shell. Add the meringue in spoonfuls, starting around the edges working your way in towards the middle. Give it all a careful swirl with the spoon, creating small peaks. Return to the oven for 18-20 mins until the meringue is crisp and slightly coloured. Let the pie rest 1⁄2-1 hr before slicing. When completely cooled, keep in the fridge. It’s best eaten the same day it’s been made.

Pumpkin and sweet potato soup

With this rainy, gloomy weather we are having today I thought I share a soup recipe. We had this lovely filling soup in Baños, Ecuador, on a rainy day like today. This was one of the few days with bad weather we had in Ecuador, in fact one of the few rainy days of the 6 months we spent in South America. We hadn’t brought any rain clothes with us even. Now it was pouring down however and we had no choice and bought these cheap, disposable rain capes. Bright yellow ones. We were walking around Baños looking like Big Bird and his out-of-town cousin. We came around a corner and bumped in to a British couple wearing exactly the same capes. It was just so silly and we were just standing there pointing at each other not being able to stop laughing. From then on we decided to just get wet would it rain again.
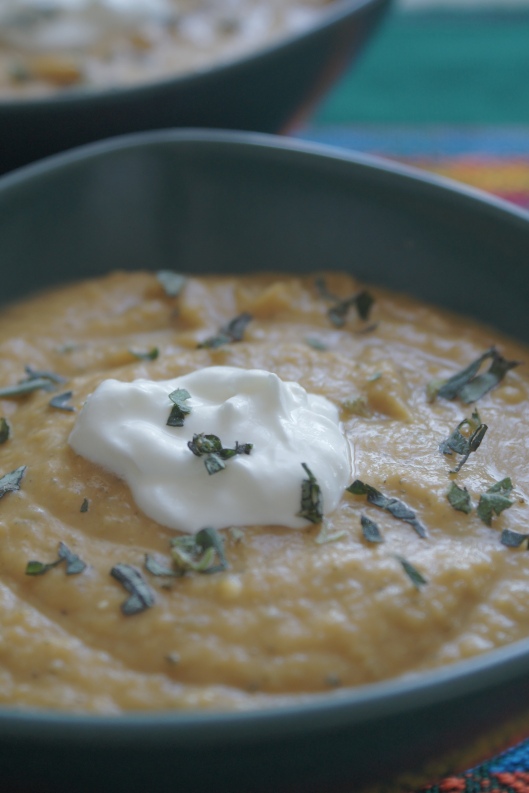
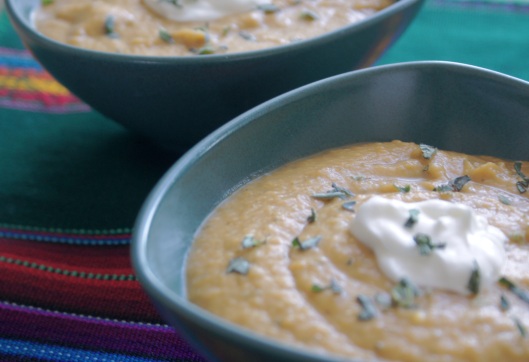
As you can see on the pics, my soup is rather thick, almost purée like. If that is not to your liking, just add some more stock.

Serves 4

2 tbsp sunflower oil
1 onion, finely chopped
2 garlic cloves, minced
1 tsp paprika powder
Handful of fresh oregano (save some for garnish)
450g pumpkin, peeled, seeds removed and cut in chunks
350g sweet potato, peeled and cut in chunks
700 ml vegetable stock
Salt and pepper
125 ml sour cream

Heat the oil to medium heat in a large saucepan. Cook the onion and garlic for a few minutes until soft but not coloured. Add paprika powder and oregano, stir to combine and cook for 1 minute. Add the pumpkin and the sweet potato chunks. Cook for 5-7 minutes, stirring occasionally. Pour the stock into the pan. Bring to a boil, lower heat and let the soup gently cook until the pumpkin and potatoes are cooked through. Purée with a handblender. Season with salt and pepper. Garnish each portion with sour cream and shredded oregano leaves